Real System Implementation (3D Optical Scanner: WLS400A)
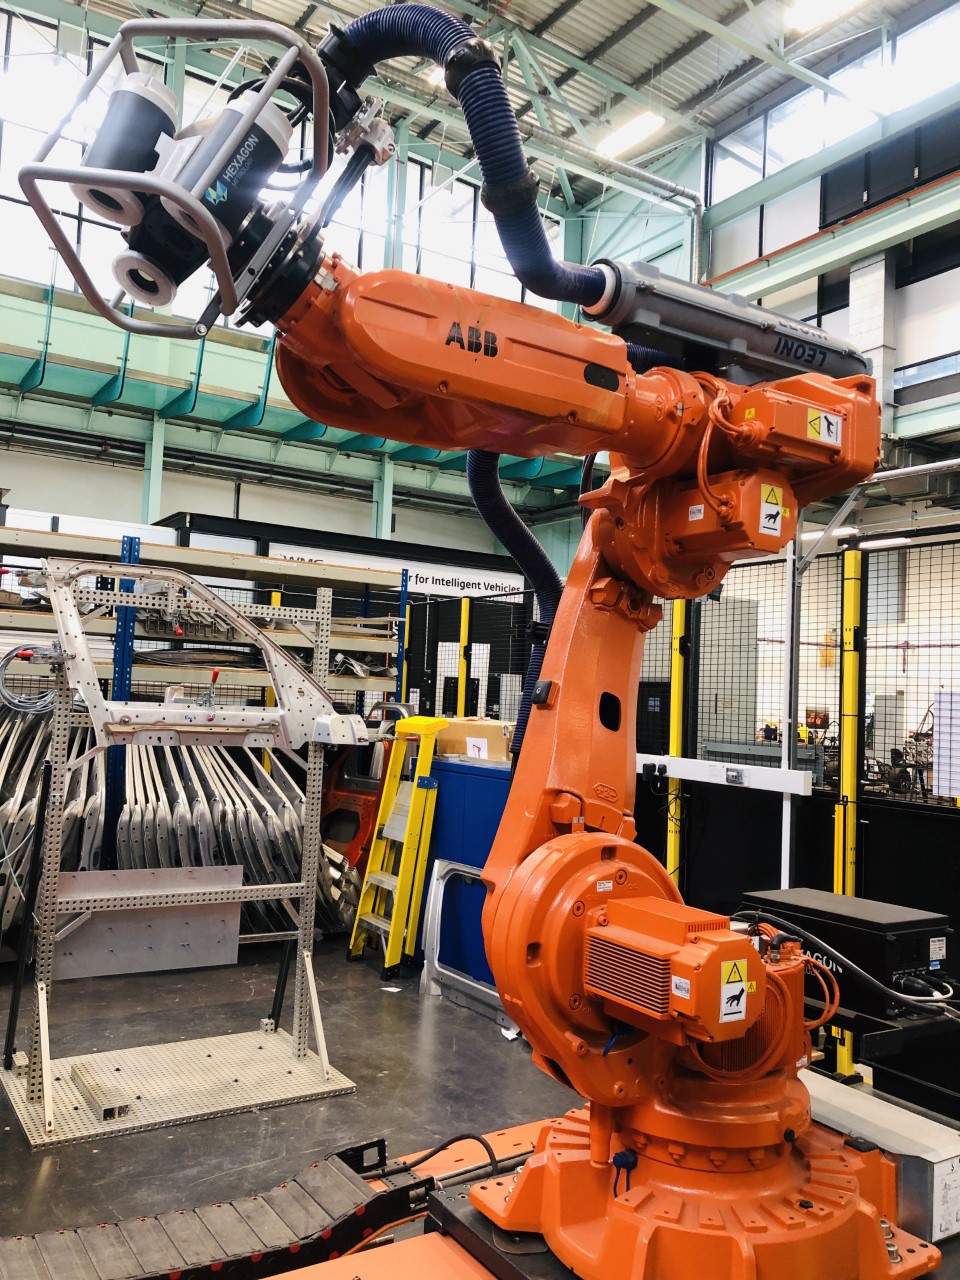
Real Measurement data obtained from 3D Optical Scanners is cloud of point data which is processes and node deviations are obtained from the software. This is done within the software provided by the vendor itself. The current implementation is based on the WLS400A Hexagon scanner mounted on a ABB robot and the software includes CoreView Teach and CoreView AM (refer: https://www.hexagonmi.com/products/white-light-scanner-systems/hexagon-metrology-wls400a and https://www.hexagonmi.com/products/software/software-for-white-light-scanner-systems/coreview-teach)

Fig 1:ABB Robot with a Hexgaon WLS400 scanner head
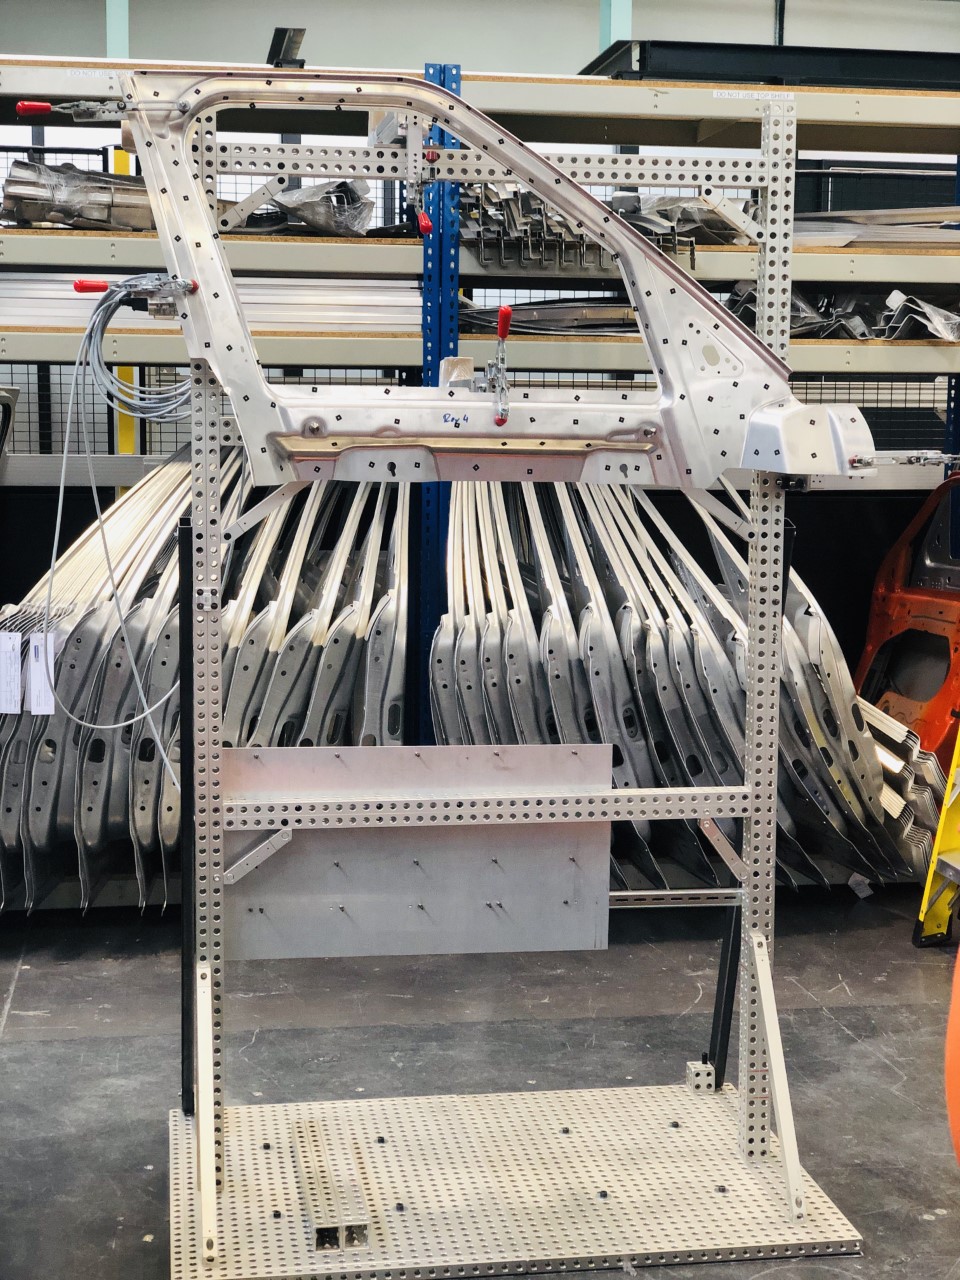
This data is similar to the data generated by the VRM software and a model trained on simulated data is deployed on measurement data obtained from the system. A demonstration for this was done as the our group (https://warwick.ac.uk/fac/sci/wmg/research/digital/dlm/) at WMG, University of Warwick under the In-Process Quality Improvement Project (https://warwick.ac.uk/fac/sci/wmg/research/digital/dlm/projects/ipqi_new)

Fig 2: Setup for actual system verification and validation
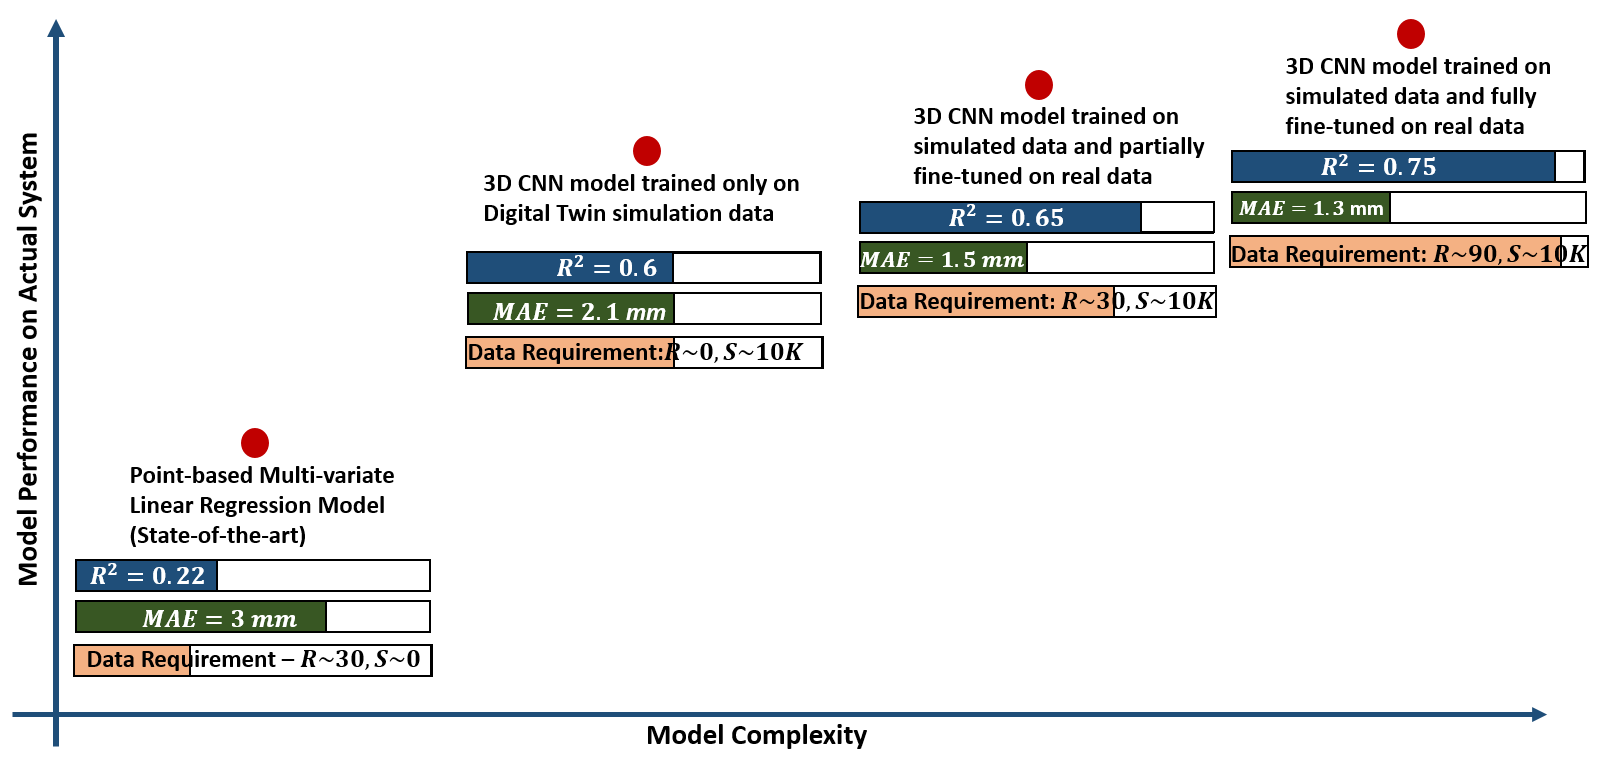
- The model performs better as it fine tuned on a small amount of the real data obtained from the system to compensate for minor differences between simulation and real system. This enables the following:
to use a single model from design phase to full scale production phase by integrating small amount of actual system data obtained during operation
Can be adapted to dynamic changes in the manufacturing system

Fig 3: Verification and validation results
The poster for the industrial demonstration located at the International Manufacturing Center, WMG, University of Warwick can be found below
In-Process Quality Improvement - Industrial Demonstration Poster
The details for the steps followed from conceptualization to verification and validation for the Industrial Demonstration are in the document below
3D Convolutional Neural Networks for Root Cause Analysis: Industrial Demonstration